How Can We Help?
View and Modify Message Types
To view all message types, go to the Administration section of the main menu and click on Messaging Framework.
Message types can be Active or Inactive. The Active message types appear under Messaging Hub in the main menu. To make an Inactive message type Active, just click on the name of the message type and click the Active toggle to change to Yes and click Save.
The order of the message types in the main menu is determined by the ordering of message types in the Relationships tab. Automatically related message types are higher on the list than manually related message types. Message types are ordered from top to bottom if there is more than one message type in an inheritance level. So message types in Level 1 will be first, then Level 2, 3, etc. Then come the manually related message types from left to right.
Edit Message Types
Your GrokSpark instance comes with a standard set of message types (both Active and Inactive) that can be changed to better suit your needs as your company evolves.
To edit a message type, start by clicking on the name of the message type on the Messaging Framework Setup page in the Administration section of the main menu.
Details Tab
In the Details tab of the message type you can change the name and description of the message type in addition to determining if the message type is Active or Inactive.
Note: If you change the name of the message type and save it, that new name would be visible everywhere that message type name appears.
Fields Tab
To change fields on the message type click on the Fields tab and then you can Edit any of the existing fields or add New Fields.
Click the Edit button of the field you want to edit. You can then change the Field Label or any other properties of the field. Field property meanings:
Field Label
What the field is called throughout your GrokSpark instance.

Field Instructions
The instructions for Authors of your messaging to know what exactly to put into this field on messages. Default instructions exist for standard message fields and can be modified.

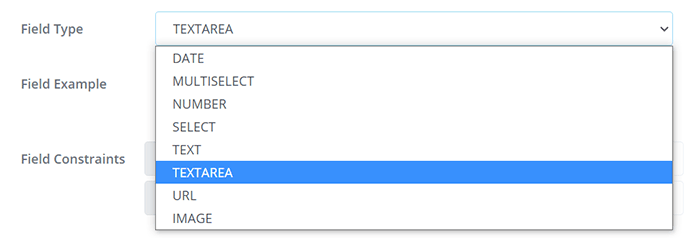
Field Type
These are mostly self-explanatory, but note that TEXTAREA should be selected instead of TEXT in cases where you expect the field to contain more than about 5 words.

Field Example (TEXT and TEXTAREA only)
This is where you put an example to help Authors see what their field information should be like. Default examples exist for standard message fields and can be modified.

Field Constraints (TEXT and TEXTAREA only)
You can use word and/or character minimums or maximums or both. Note: You must use an integer for your limits or keep the limits at “0” for no limits.

Field Option (SELECT and MULTISELECT only)
These are the options that will appear in the picklist for the SELECT or MULTISELECT field. Options should be entered as a comma separated list.

Field Settings – Identifier Field
This is what identifies the message throughout the system. It is generally set to be the Name field (e.g. Product Name, Feature Name, etc.). There must be one (and only one) Identifier Field per message type.
Field Settings – Required
Decide if you want it to be required for this field to be filled out in order to save the message.
Field Settings – Visible in Messaging List
This determines if the field will show up in the messaging list. If you have too many fields in the list it will require horizontal scrolling and some columns may be narrower than desired.
Delete a Message Type
You can delete message types. Just navigate to Administration > Messaging Framework and click on the name of the message type you want to delete.
In the bottom right corner of the Details tab you will see a Delete button. Click the button to delete the message type.
Note:
- All messages of that type will be deleted including drafts as well as published messages.
- Any docs that use that message type in the filter criteria or in the messaging sections will be affected. These should be checked and updated to not rely on that message type.
Add a Message Type
You can add new message types as well. Just navigate to Administration > Messaging Framework and click on the New Type button.
Note: Short Name is auto-generated but can be customized if needed (cannot be the same as another message type’s short name. It CANNOT be changed once the new message type is saved.
The short name is only used by the GrokSpark API and in URLs, so isn’t highly visible in the system, but it’s best to make the short name something that isn’t going to cause confusion.
Role |
Permissions |
|
Basic Contributor Author |
No access |
|
Editor Admin |
View All, Edit All, Add New |