How Can We Help?
Creating a Guide:
There are two ways to create a guide in GrokSpark.
- From “blank” using the guide builder
- By cloning an existing guide
Creating a Guide using the Guide Builder:
This section is for users who wish to create a guide starting from “blank”.
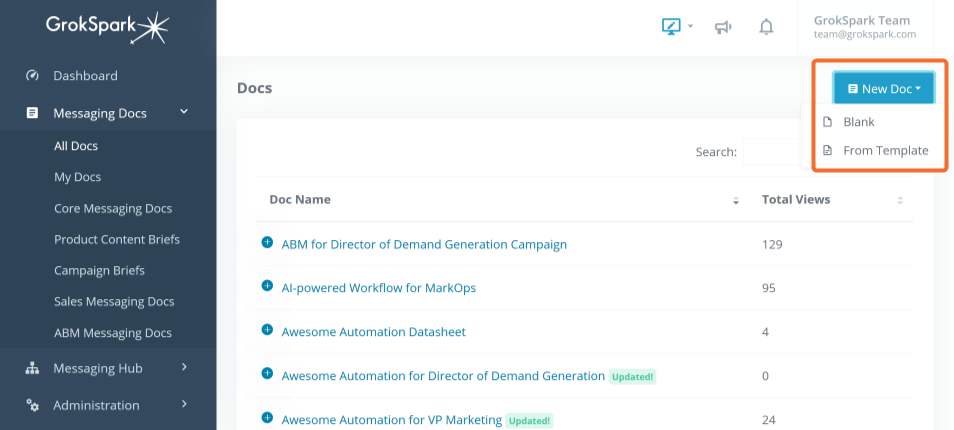
Navigate to Messaging Guides > All Guides from the main menu. Click on the New Guide button in the top right and select Blank from the dropdown. This will open the guide builder where you can name your guide and add messaging sections. You can also add filters.
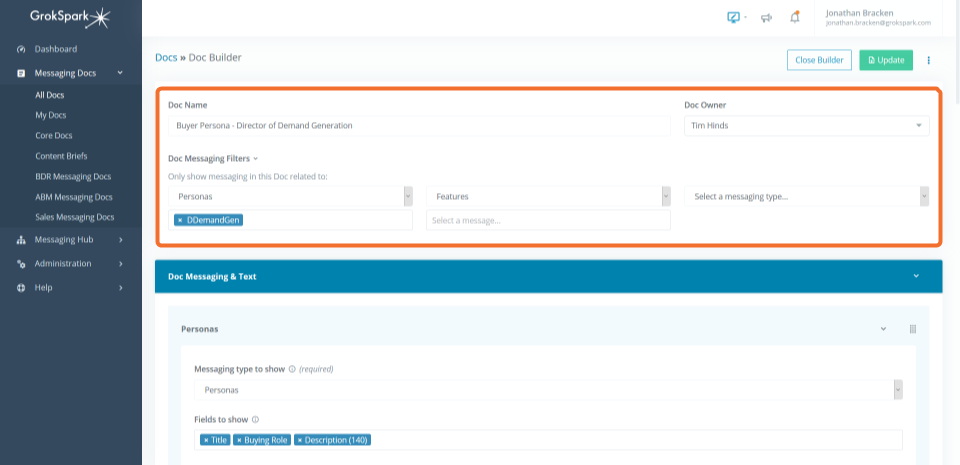
At the top of the Guide Builder add your guide name and owner (default is you).
If you want to add Guide Filters just expand the Guide Messaging Filters section and you have the option to add a filter or filters for the Guide. Once you select the message type for the filter you can then select one or more Message(s) from the box below each filter.
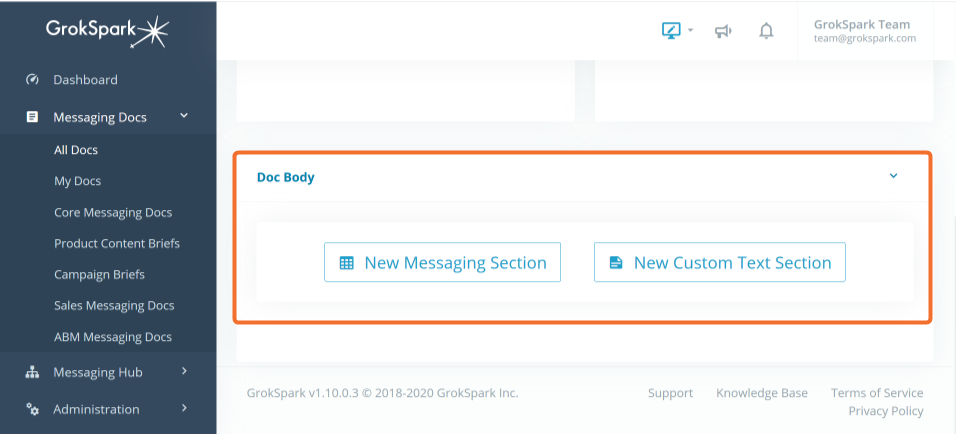
Once you’ve added your filters (don’t worry, you can change them later if you want) you can go down to the Guide Messaging and Text section below. Here you can add one or more Messaging sections or Custom Text sections which determine what information will show up on the guide after any filters (you previously created) have been applied.
A Custom Text section can be used to add any explanatory text at the top of the guide or ahead of any of the sections. You can enter any text you want using the markdown editor. You can also apply formatting to help you get your point across. To preview what it will look like in the guide , click the eye icon above the text box.
Messaging sections will make up the core of your guide. You can report on anything you’ve added to the messaging hub. Once you’ve clicked the button for New Messaging Section you can then select which message type you want to see fields from.
Next you can choose which field or fields you want to see from that message type in the section.
Lastly, you can group the message fields by another message type. This is useful for things like showing features grouped by the benefits they create. Or challenges grouped by the personas that have them.
Continue adding Messaging sections and Custom Text sections until you have completed your guide. Then in the top right you will click the Save button.
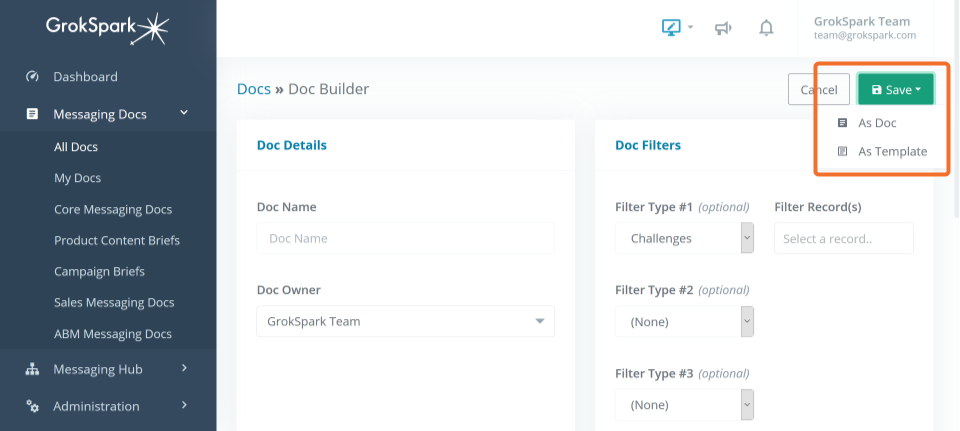
Once saved, you can close the builder to view the guide or you can continue building. Just remember to click the Update button after any additional changes to make sure you save them.
Creating a Guide by cloning:
- Navigate to the guide you want to clone from.
- Click on the New Guide button
- Select Clone from the dropdown
- Enter the name of your new guide (you can change it later)
- You will be directed to the Guide Builder where you can make any changes to the filters and/or messaging and custom text lists.
- When you are done with your changes, click the Update button in the top right.
To see how to edit filters and sections in guides see Creating a Guide using the Guide Builder above.
Modifying an Existing Guide:
- Navigate to the guide you want to modify and click the Edit button.
- Change the Guide Details, Guide Filters (if applicable), Messaging Sections and Custom Text Sections as described in the Creating a Guide using the Guide Builder section above.
- Click the Update button when finished.
Click the Close Builder button to see the updated guide.
Role |
Permissions |
| Basic | View, Create, Edit Own |
| Contributor | View, Create, Edit Own |
| Author | View, Create, Edit Own |
| Editor | View, Create, Edit All |
| Admin | View, Create, Edit All |