How Can We Help?
Overview
This article covers the steps for setting up your GrokSpark GTM Messaging Hub with your messaging. It includes the recommended order of populating your messages to take advantage of the auto-relation capability. Once you have completed these steps you will have a messaging hub that is ready for use.
In general, the approach will be to first confirm which message types to include in your hub and then you will create the company message type which will include your company-level messaging. Next, you will go through the process of adding messaging for all of the other selected message types. While they can be created in any order, the recommended approach outlined below will allow you to take full advantage of the GrokSpark automatic relationships between messages.
You will start by building out your messaging from the product point of view and then you will switch to looking at it from an audience point of view. Then they will be automatically linked together so you can tell the full story for each of your target audiences.
Collaboration
As you are building your messaging in GrokSpark you can add users to participate in the messaging hub building process.
Message Type Selection
Navigate to Administration > Messaging Framework from the main menu. Here you can determine which message types you want to include in your messaging hub. By default, the following message types are included. They have been preconfigured with standard fields, but only some of them are in Active status:
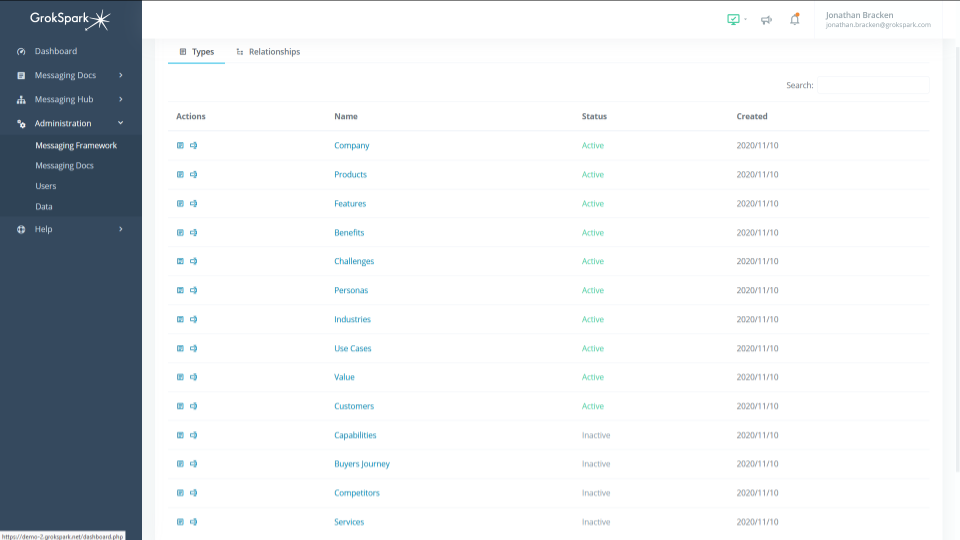
Review the list of message types and determine which ones you want to include and exclude from your messaging hub. Active status means that the message type will appear in the main navigation and will be a visible part of your messaging framework. Inactive status means the message type will not be visible, but can be added later if you choose to do so.
To change the status just click on the message type name and change the Active toggle and click the Save button.
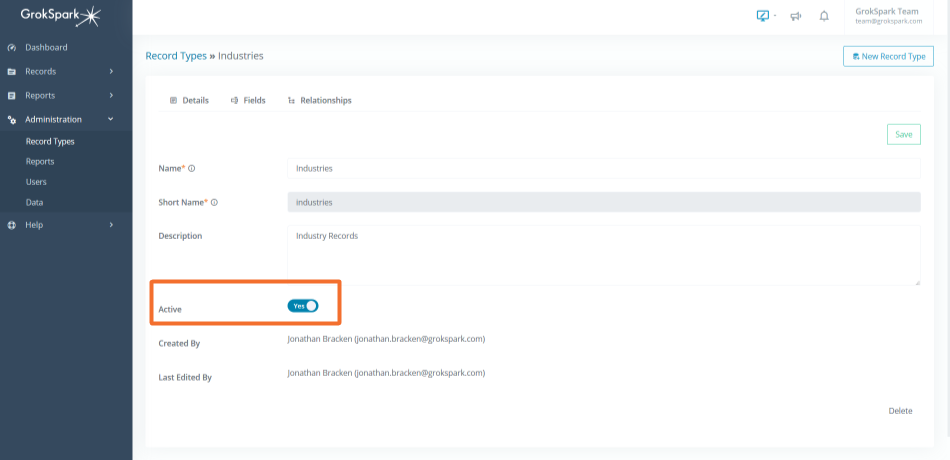
For any modifications to message types, see how to add and edit message types.
Company
To set up your company messaging, navigate to Messaging Hub > Company and click on the Edit button. Fill out each field with the appropriate information. When you click into a field you will see the instructions for filling out that field as well as an example. Using these as a guide, complete the company message and click the Save Draft button.
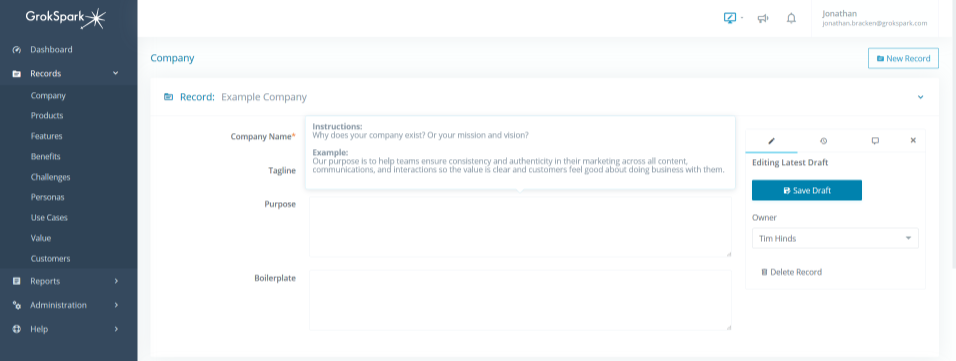
This company information will be available in any of your messaging docs.
If you are collaborating on the messaging, at this time you can add a comment for another user to review your draft prior to publishing.
Product Messages
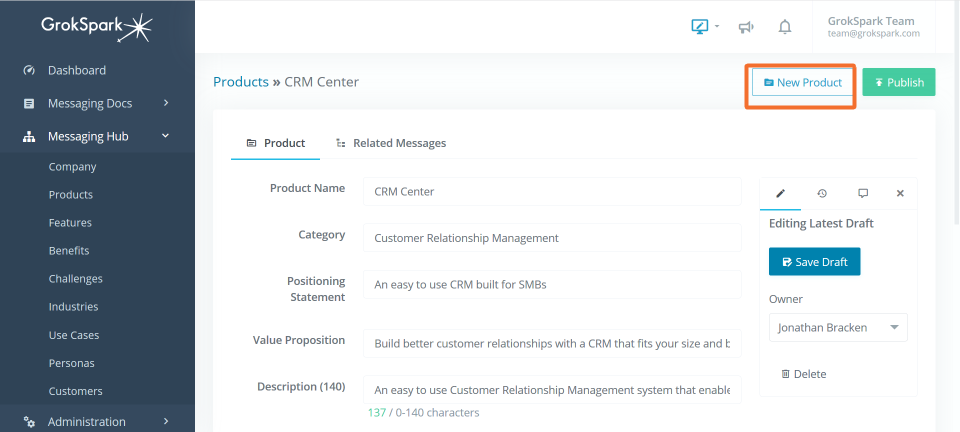
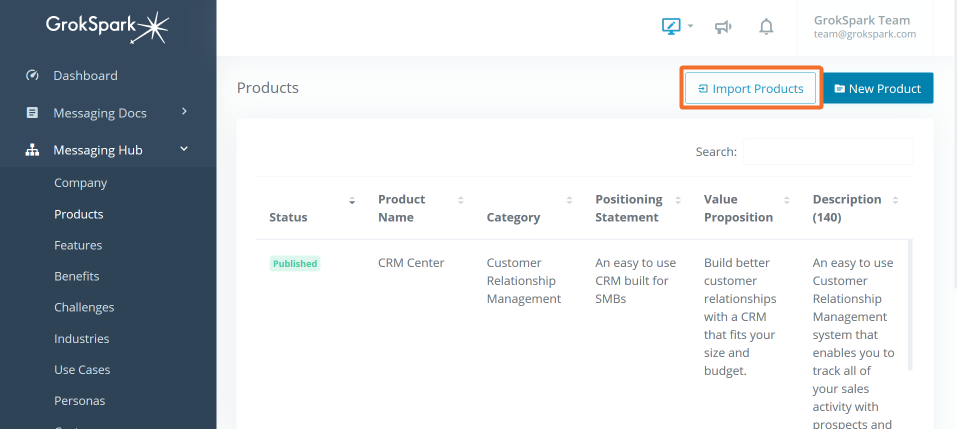
To add your product messaging, navigate to Messaging Hub > Products and click on the Example Product and then click the Edit button. If you have already modified the example product you can click the New Product button from the Products list.
Fill out each field with the appropriate information. Just as with the company message, when you click into a field you will see the instructions for filling out that field as well as an example. Using these as a guide, complete the product message and click the Save Draft button.
Once you have saved the draft message, you will see a Related Messages tab adjacent to the message. This is where you will see all of the other messages that are related to this product message once you have created them. But for now, you don’t need to do anything here.
If you have more that one product, then now is the time to create the other product messages by following the steps above followed by clicking the Save Draft button after each one.
Importing Messages
If you need to add many messages of a message type and you already have the information in another format, it could make things easier to just import the messages via .csv.
First, navigate to the message type you want to import the messages into. Then click on the Import button.
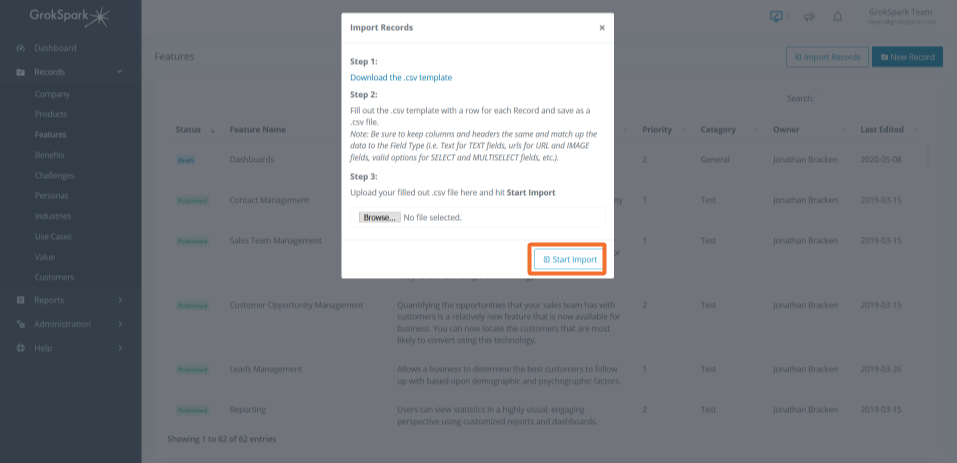
Then follow the steps on the Import Messages modal which are as follows:
- Download the .csv template. This file is specific to the message type you are on. You can only import messages from one message type at a time. The template file includes all of the fields that are currently included in that message type. If you need to change the fields, you’ll need to modify them on the record type in GrokSpark prior to downloading the .csv template.
- Fill out the .csv template with a row for each message and save as a .csv file.
Note: Be sure to keep columns and headers the same and match up the data to the Field Type (i.e. Text for TEXT fields, urls for URL and IMAGE fields, valid options for SELECT and MULTISELECT fields, etc.).
- Upload your filled out .csv file by selecting the file and clicking the Start Import button.
Feature Messages
To add your feature messaging, navigate to Messaging Hub > Features and click on the Example Feature and then click the Edit button. If you have already modified the example feature you can click the New Feature button from the Feature list.
Fill out each field with the appropriate information. Just as with the product messages when you click into a field you will see the instructions for filling out that field as well as an example. Using these as a guide, complete the feature message and click the Save Draft button.
Note: Feature messaging should be written in a way that specifies what exactly the feature does, but is generic to the target audiences.
See more about how to write your messaging.
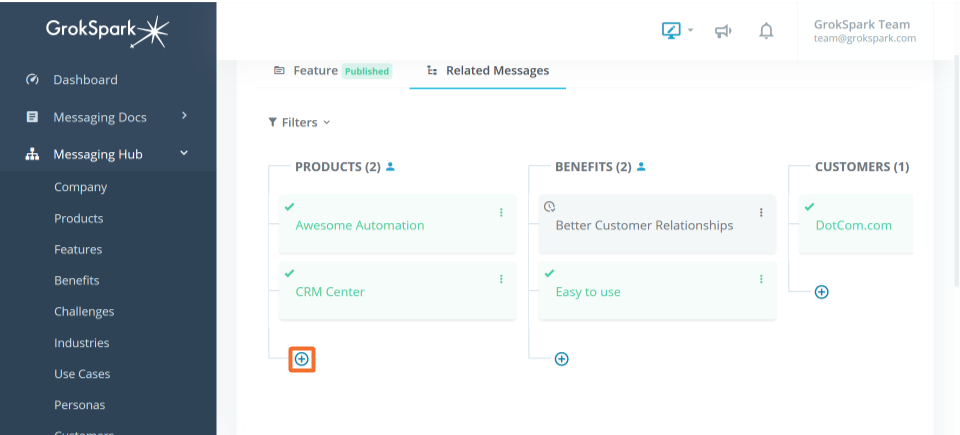
Once you have saved the draft message, you will see a Related Messages tab adjacent to the message. This is where you will see all of the other messages that are related to this feature message once you have created them. Since you’ve already created your product(s), now you can add relations to each of the products your feature is in.
To add a related message, just click the plus sign below the Products column and select the products you want to relate and click the Relate Selected button.
The related messages will be saved into draft relationship status and will only be published when you click the Publish button on the message. See more about draft relationships.
Once you have finished adding relationships to your message you can add another one by clicking on the New Feature button or move to the next step.
Persona Messages
To add your persona messaging, navigate to Messaging Hub > Personas and click on the Example Persona and then click the Edit button. If you have already modified the example persona you can click the New Persona button from the Personas list.
Fill out each field with the appropriate information. Just as with the product messages when you click into a field you will see the instructions for filling out that field as well as an example. Using these as a guide, complete the persona message and click the Save Draft button.
Note: Most (if not all) of the persona message fields are metadata about the persona as opposed to messaging you will use for that persona. So while the fields should be written in a way that is specific to who the persona is, the intended audience in most cases for this information is internal.
See more about how to write your messaging.
Once you have saved the draft message, you will see a Related Messages tab adjacent to the message. This is where you will see all of the other messages that are related to this persona message once you have created them. For now you should skip this section as you will be creating related messages from the other message types to the personas.
Once you have finished adding relationships to your message you can add another one by clicking on the New Persona button or move to the next step.
Use Case Messages:
Next you will add your use cases. To add this messaging, navigate to Messaging Hub > Use Cases and click on the Example Use Case and then click the Edit button. If you have already modified the example use case you can click the New Use Case button from the Use Cases list.
Fill out each field with the appropriate information. Just as with the product messages when you click into a field you will see the instructions for filling out that field as well as an example. Using these as a guide, complete the use case message and click the Save Draft button.
See more about how to write your messaging.
Once you have saved the draft message, you will see a Related Messages tab adjacent to the message. This is where you will see all of the other messages that are related to this use case message once you have created them. At this time you should only relate the use case message to each of the persona messages that care about this use case.
To add a related message, just click the plus sign below the Personas column and select the personas you want to relate and click the Relate Selected button.
Once you have finished adding relationships to your message you can add another one by clicking on the New Use Case button or move to the next step.
Industry Messages:
Next you will add your Industries. If you do not want to activate this message type at this time, you can skip this section. To add this messaging, navigate to Messaging Hub > Industries and click on the Example Industry and then click the Edit button. If you have already modified the example industry you can click the New Industry button from the Industries list.
Fill out each field with the appropriate information. Just as with the product messages when you click into a field you will see the instructions for filling out that field as well as an example. Using these as a guide, complete the industry message and click the Save Draft button.
See more about how to write your messaging.
Once you have saved the draft message, you will see a Related Messages tab adjacent to the message. This is where you will see all of the other messages that are related to this industry message once you have created them. At this time you should only relate the industry message to each of the persona and use case messages that are related to this industry.
To add a related message, just click the plus signs below the message type columns and select the messages you want to relate and click the Relate Selected button.
Once you have finished adding relationships to your message you can add another one by clicking on the New Industry button or move to the next step.
Challenge Messages:
Next you will add your Challenges. To add this messaging, navigate to Messaging Hub > Challenges and click on the Example Challenge and then click the Edit button. If you have already modified the example challenge you can click the New Challenge button from the Challenges list.
Fill out each field with the appropriate information. Just as with the product messages when you click into a field you will see the instructions for filling out that field as well as an example. Using these as a guide, complete the challenges message and click the Save Draft button.
See more about how to write your messaging.
Once you have saved the draft message, you will see a Related Messages tab adjacent to the message. This is where you will see all of the other messages that are related to this challenge message once you have created them. At this time you should relate the challenge message to each of the persona, use case and industry messages that are related to this challenge.
To add a related message, just click the plus signs below the message type columns and select the messages you want to relate and click the Relate Selected button.
Once you have finished adding relationships to your message you can add another one by clicking on the New Challenge button or move to the next step.
Benefit Messages:
Next you will add your Benefits. To add this messaging, navigate to Messaging Hub > Benefits and click on the Example Benefit and then click the Edit button. If you have already modified the example benefit you can click the New Benefit button from the Benefits list.
Fill out each field with the appropriate information. Just as with the product messages when you click into a field you will see the instructions for filling out that field as well as an example. Using these as a guide, complete the benefit record and click the Save Draft button.
Note: Make the benefit messaging specific for what it does for a persona. If the benefit is the same for multiple personas, that’s fine…you don’t need to duplicate it, but otherwise make it specific and later you’ll map it as appropriate.
See more about how to write your messaging.
Once you have saved the draft message, you will see a Related Messages tab adjacent to the message. This is where you will see all of the other messages that are related to this benefit message once you have created them. At this time you should relate the benefit message to each of the features that create the benefit. Then you should relate the benefit to each of the challenges the benefit addresses.
To add a related message, just click the plus signs below the message type columns and select the messages you want to relate and click the Relate Selected button.
You will then see the automatic relationships created between the benefit and the products, personas, use cases and industries.
Once you have finished adding relationships to your message you can add another one by clicking on the New Benefit button or move to the next step.
Value Messages:
Next you will add your Value messaging by navigating to Messaging Hub > Value and click on the Example Value and then click the Edit button. If you have already modified the example value you can click the New Value button from the Value list.
Fill out each field with the appropriate information. Just as with the product messages when you click into a field you will see the instructions for filling out that field as well as an example. Using these as a guide, complete the value message and click the Save Draft button.
See more about how to write your messaging.
Once you have saved the draft message, you will see a Related Messages tab adjacent to the message. This is where you will see all of the other messages that are related to this value message once you have created them. At this time you should relate the value message to each of the other messages that are related to this value (there is no auto-relating for value)..
To add a related message, just click the plus signs below the message type columns and select the messages you want to relate and click the Relate Selected button.
Once you have finished adding relationships to your message you can add another one by clicking on the New Value button or move to the next step.
Customer Messages:
Next you will add your Customers by navigating to Messaging Hub > Customers and click on the Example Customer and then click the Edit button. If you have already modified the example customer you can click the New Customer button from the Customers list.
Fill out each field with the appropriate information. Just as with the product messages when you click into a field you will see the instructions for filling out that field as well as an example. Using these as a guide, complete the customer message and click the Save Draft button.
See more about how to write your messaging.
Once you have saved the draft message, you will see a Related Messages tab adjacent to the message. This is where you will see all of the other messages that are related to this customer message once you have created them. At this time you should relate the customer message to each of the other messages that are related to this customer (there is no auto-relating for customers).
To add a related message, just click the plus signs below the message type columns and select the messages you want to relate and click the Relate Selected button.
Once you have finished adding relationships to your message you can add another one by clicking on the New Customer button or move to the next step.
All Other Message Types:
All records for other message types can be added at this time. In each case you will need to manually relate messages from the other message types.
Role |
Permissions |
| Basic | None |
| Contributor | None |
| Author | None |
| Editor | Add, delete, and modify Message Types |
| Admin | Add, delete, and modify Message Types |